Starting a QRiS Project
This tutorial will walk you through creating a new QRiS project as well as the typical first few steps to set up a project ready for design, monitoring or analysis work.
Prerequisities
For this tutorial you will need:
- QGIS with the latest version of the QRiS plugin installed.
- A project area in mind. This should be a river or reach somewhere between half to ten miles in length.
Create a New Project
- Open QGIS.
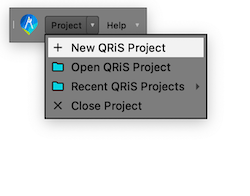
- On the QRiS Toolbar drop the "Project" menu down and click the New Project button.
- In the dialog that appears, enter a name for your project. This will be used to create a new folder on your computer. It'se helpful to name the project something descriptive, typically a name that refers to the river or reach you are working on.

At this point you have created a QRiS new project. It is represented by a folder on your computer that contains a GeoPackage file. This file will contain all of the data for your project.
Locate Your Project Area
QRiS comes with links to several popular basemaps that can be used to help locate your project area. These basemaps include satellite imagery, topographic maps, and more. You can access these basemaps from the bottom of the QRiS Project Explorer.
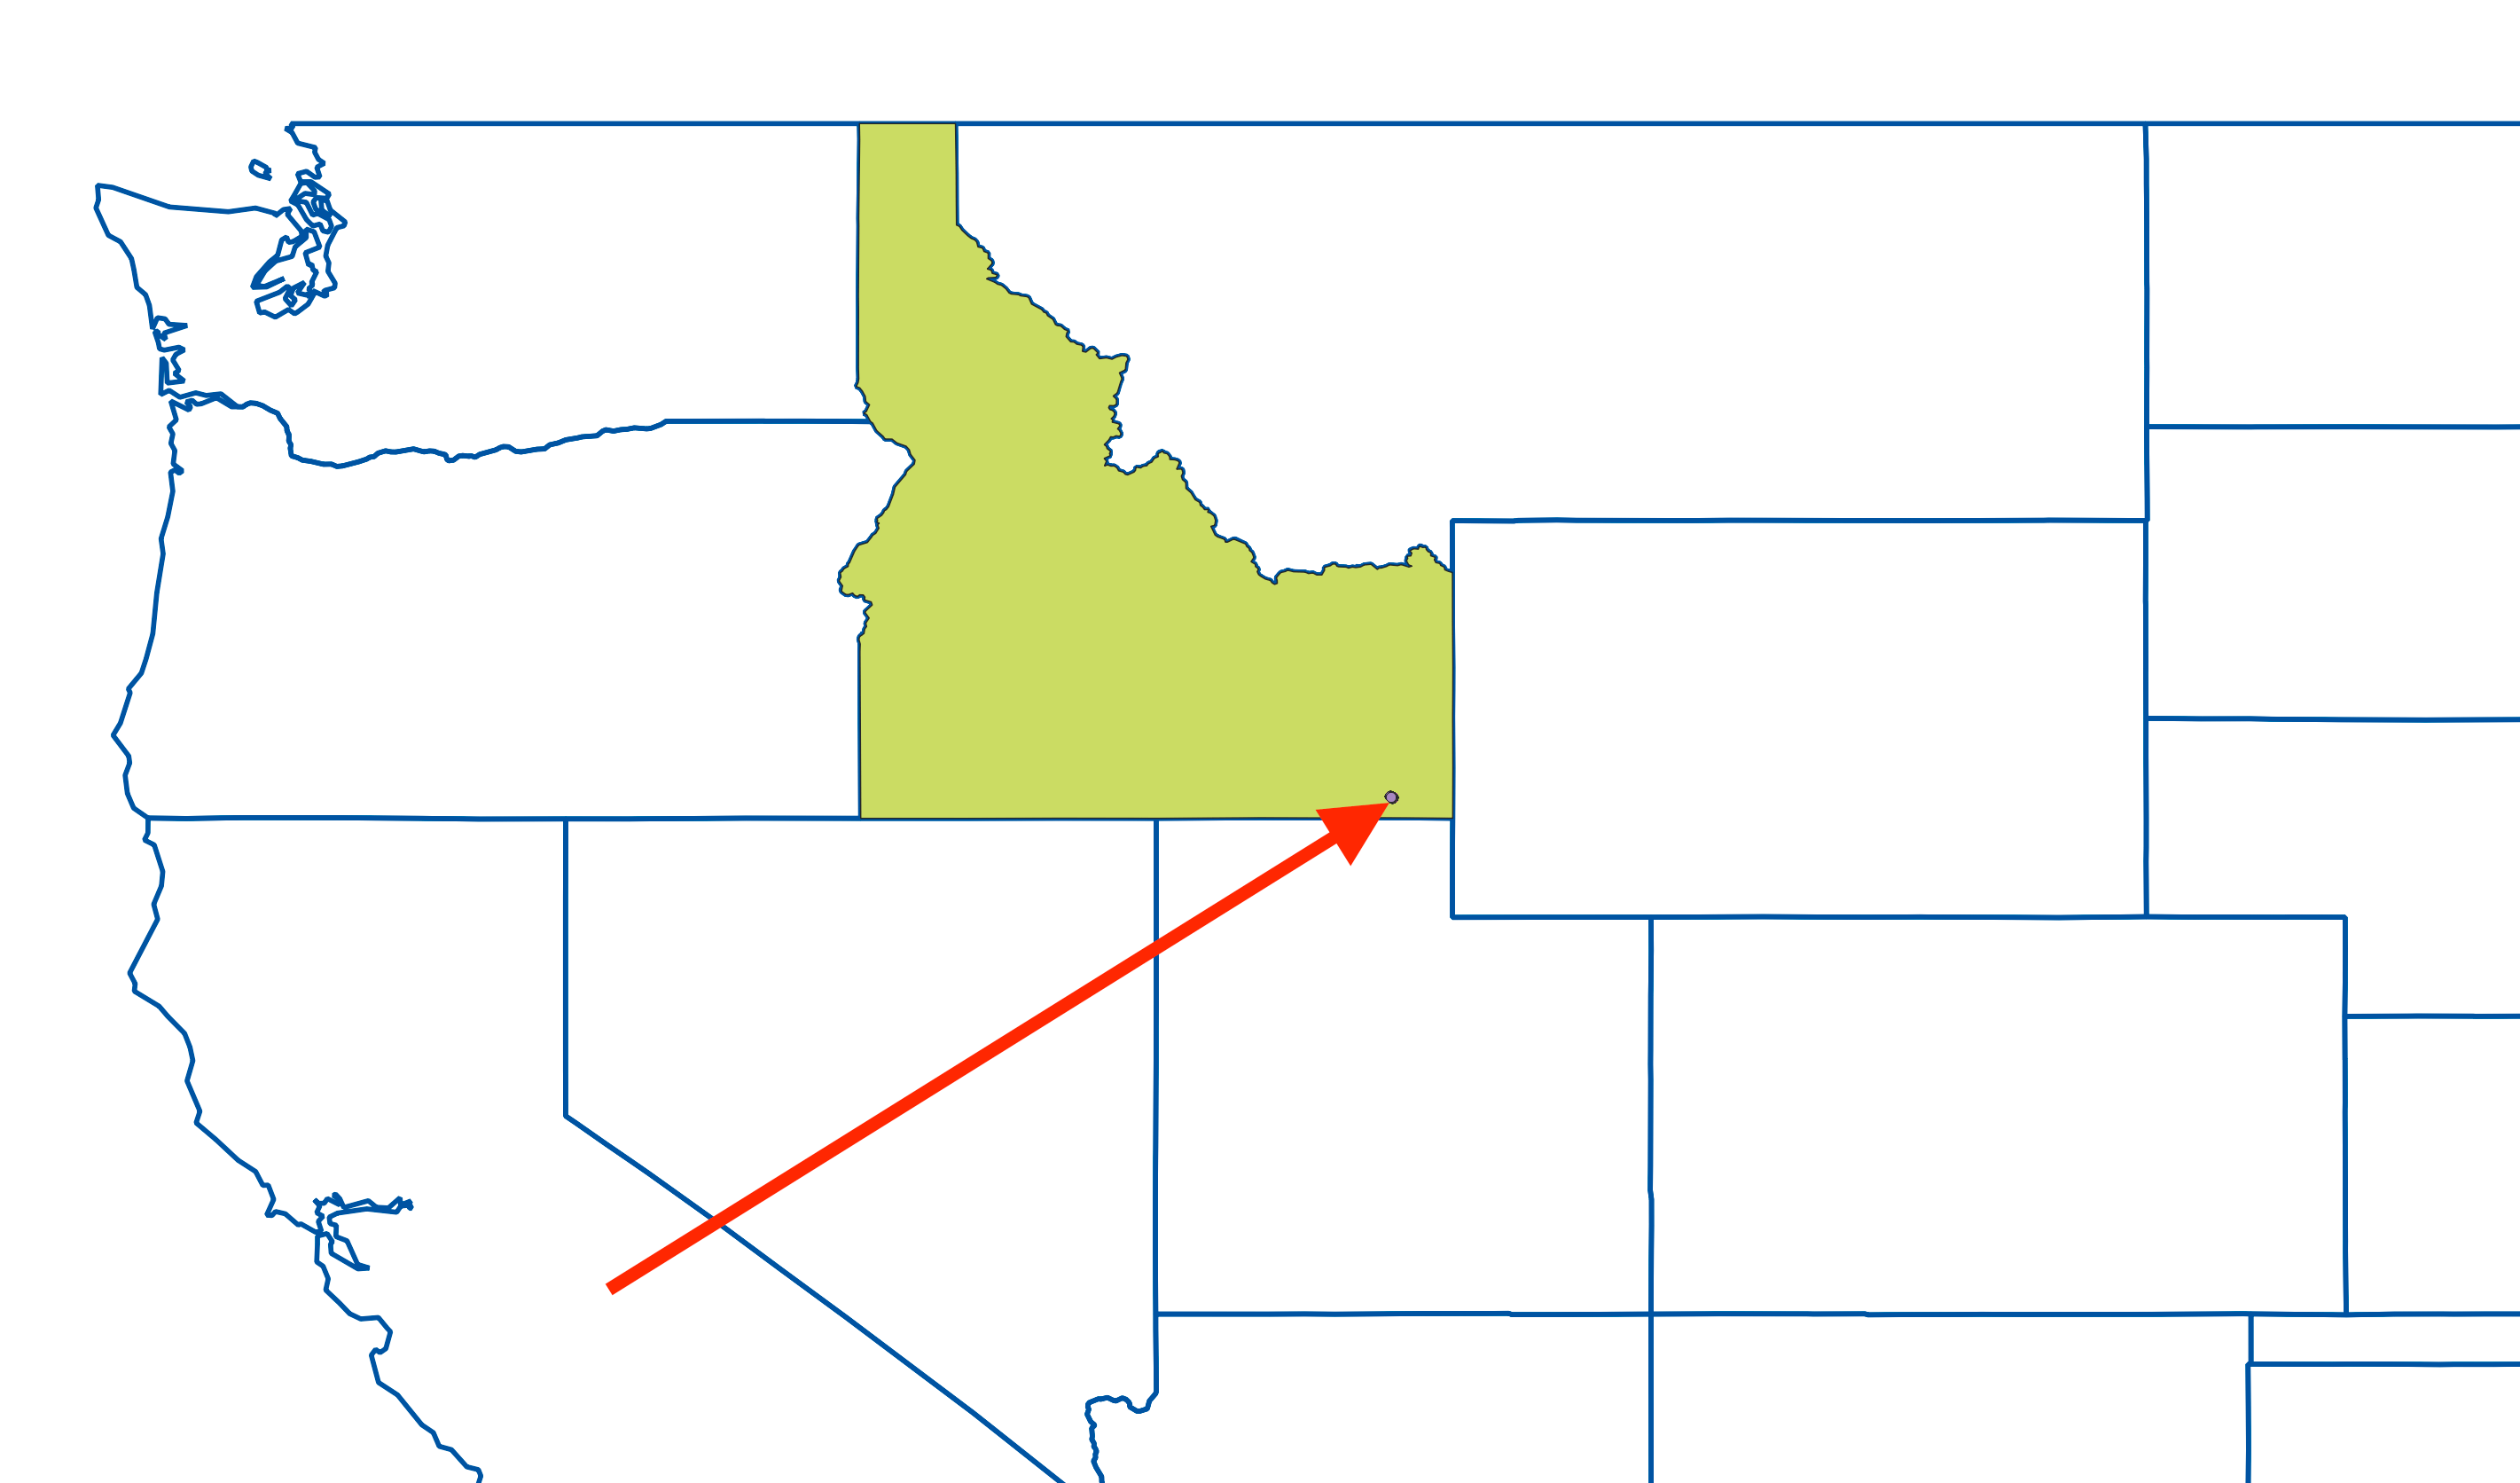
Add the Google basemap to your current map and then zoom in to your chosen project area. The tutorial dataset is based on Birch Creek, Idaho at 42.19501° N, -111.67932° W (Google Maps).
Define Your Project area
It's a good idea to define the area of your project at this point. This "Area of Interest" (AOI) will define the extent of your project and can be used to clip data as you import it into your project. There are two ways to define your AOI:
- Digitize a Polygon: You can digitize a polygon that represents the extent of your project. This is done by creating a new polygon layer in your project and digitizing the polygon that represents your AOI.
- Import a Polygon: If you have a polygon layer that represents the extent of your project, you can import it into your project.
For the purposes of this tutorial, we will digitize a polygon that represents the extent of our project.
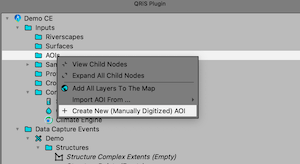
- right click on AOIs in the QRiS Project Inputs and choose **Create New (Manually Digitized) AOI".
- Provide a name for your AOI. It can be as simple as "Project Extent" or something more descriptive. (You can have multiple AOIs in your project, so you can name them whatever you like.)