LTPBR Designs
LTPBR designs are conceptual ‘as-built’ plans created before a project has been implemented. They detail the proposed spatial and temporal distribution of hypothetical structures, anticipated changes to geomorphic & hydraulic dynamics, and key riverscape features that might affect implementation logistics. Designs are an important component of low-tech restoration, serving as a framework for:
- Developing realistic project goals and objectives.
- Creating permit applications and design reports.
- Communicating expected outcomes to clients & partners.
- Guiding construction crews during implementation.
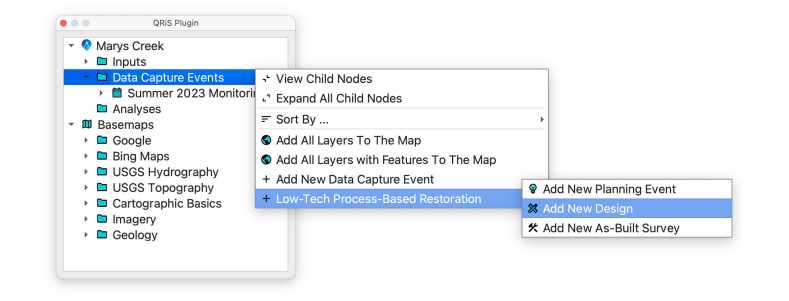
Designs can be strengthened with supplemental information including contextual riverscape data (e.g., Data Exchange), high-resolution imagery, or previously completed designs and as-builts (i.e., phases). In QRiS, designs can be added by right clicking on the Data Capture Events bin, selecting Low-Tech Process-Based Restoration, and clicking on Add New Design.
Design Interface
Once you have created a new design in QRiS, you will be prompted with the following options.
Layers
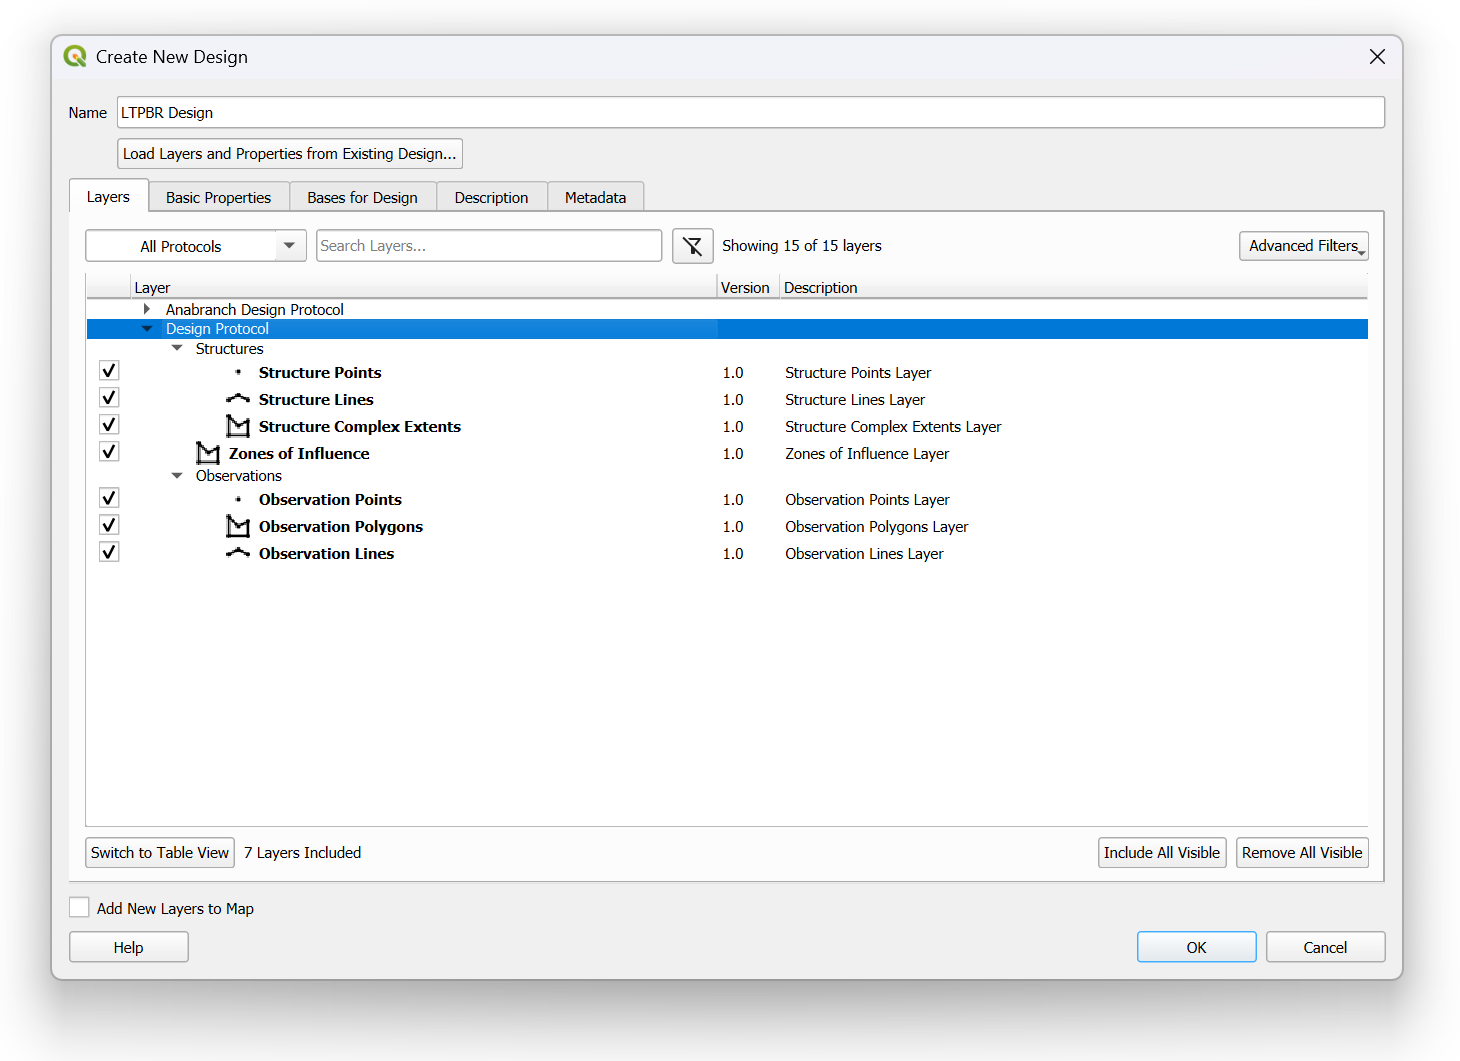
After creating a Design, a dialog window will appear where you customize the Design with point, line, and polygon layers sourced from the protocol library. This includes both a tree view (shown in the screenshot) and a table view. You have the flexibility to use as many layers as needed, drawing from a single protocol or combining elements from multiple protocols. Use the upper left drop down menu to select the design protocol(s) you want to use. You can add layers to the Design by expanding the protocol tree and selecting layers of interest (i.e., checking the layer box) or search for specific layers in the search bar. Under Advanced Filters, the user can filter layers that have been selected or ones contained within experimental protocols.
In the bottom of the dialogue window, the user can include or remove all protocol layers by selecting the Include All Visible and Remove All Visible options respectively. To the left, the user can toggle between the tree and table views by clicking on the Switch to Tree/Table View. Finally, the user can select the Add New Layers to Map option in the bottom left-hand corner to add all selected layers to the map panel.
Basic Properties
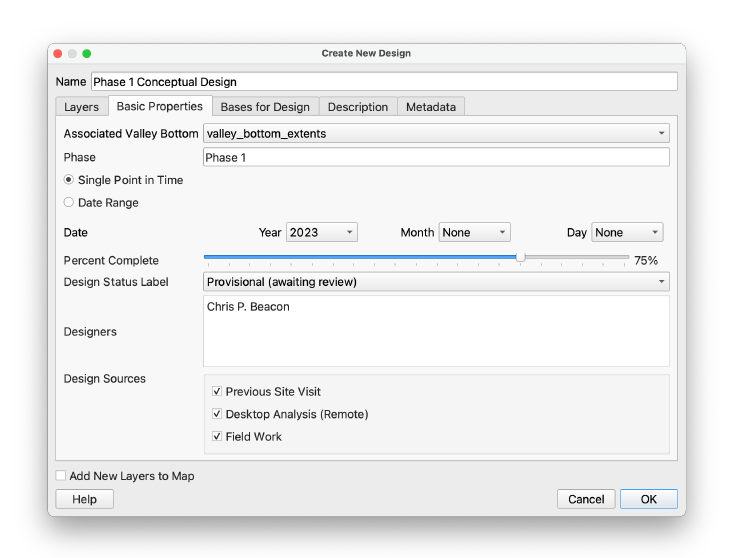
Under Basic Properties, you can provide additional information about your design such as dates of completion, design status, and more. A detailed breakdown is provided below.
ASSOCIATED VALLEY BOTTOM – The valley bottom polygon that defines the boundary of your design. This feature is linked to your design layers and will be rendered alongside them in the map panel.
DESIGN DATE – Date of design development or inception. Dates can be specified as a single point in time or as a date range.
PROJECT PHASE – Implementation phase that the design is describing. Many LTPBR projects consist of multiple phases to mark punctuated periods of restoration treatments. For example, Phase 1 may describe structural treatments constructed during the first year of implementation, while Phase 2 would refer to additional structural treatments (or maintenance) constructed in a subsequent year.
DESIGN STATUS/PERCENT COMPLETE – Tracking a design's progress towards completion. The progress of a design can be indicated by the numeric progress bar under Percent Complete or with a text label with the following options:
- IN PROGRESS: A design iteration that is unfinished or incomplete.
- PROVISIONAL: A design that has been completed but not reviewed.
- FINAL: The finalized design that has been approved for permit acquisition and to guide implementation.
DESIGNERS – Person or people who developed the LTPBR design.
DESIGN SOURCES – Describes the setting in which the design was developed.
- PREVIOUS SITE VISIT – Design was developed remotely using information collected from a previous site visit to the project area.
- DESKTOP – Design was developed on a desktop computer using GIS software (e.g., QRiS, Google Earth, etc..) and contextual data (e.g., drone imagery).
- FIELD WORK – Design was developed on-site using a mobile GIS application or other means of data capture.
Bases for Design
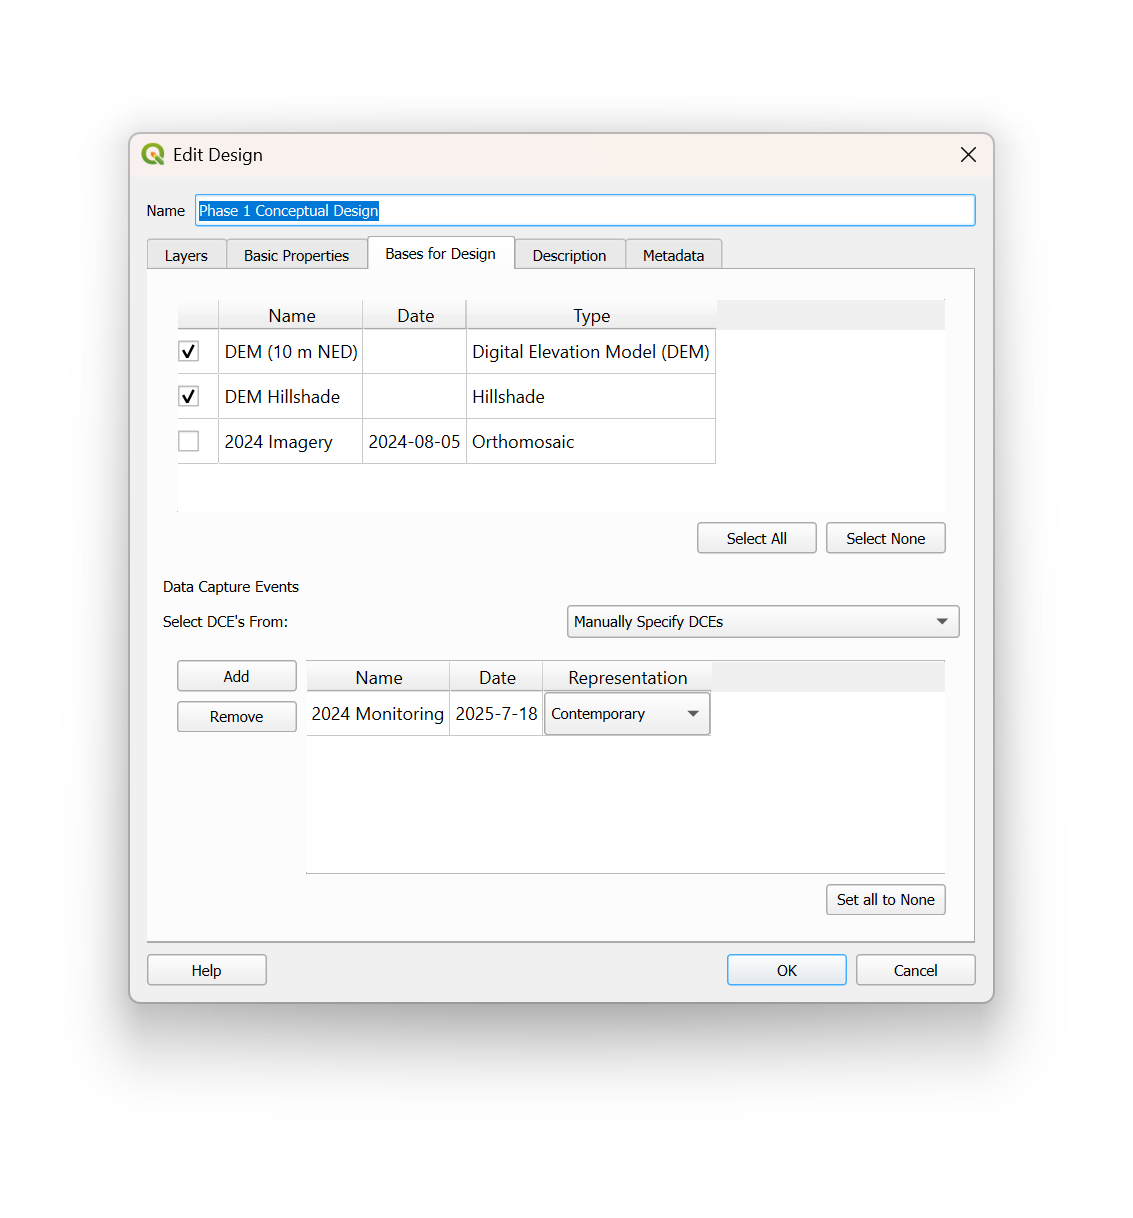
Raster surfaces (from Context or Surfaces bins) or Data Capture Events can be attached to provide important context for design development. Data Capture Events can represent the historic, contemporary, or predicted (future) riverscape condition to help visualize the potential impact of your design. Like associated valley bottoms, these come linked to your design layers and will be rendered alongside them in the map panel.
Description
Descriptive narrative related to the context, considerations, and constraints associated with the design. Descriptions may include (but not limited to) project goals and objectives, collaborating partners, riverscape constraints, implementation feasibility, monitoring considerations, etc.
Metadata
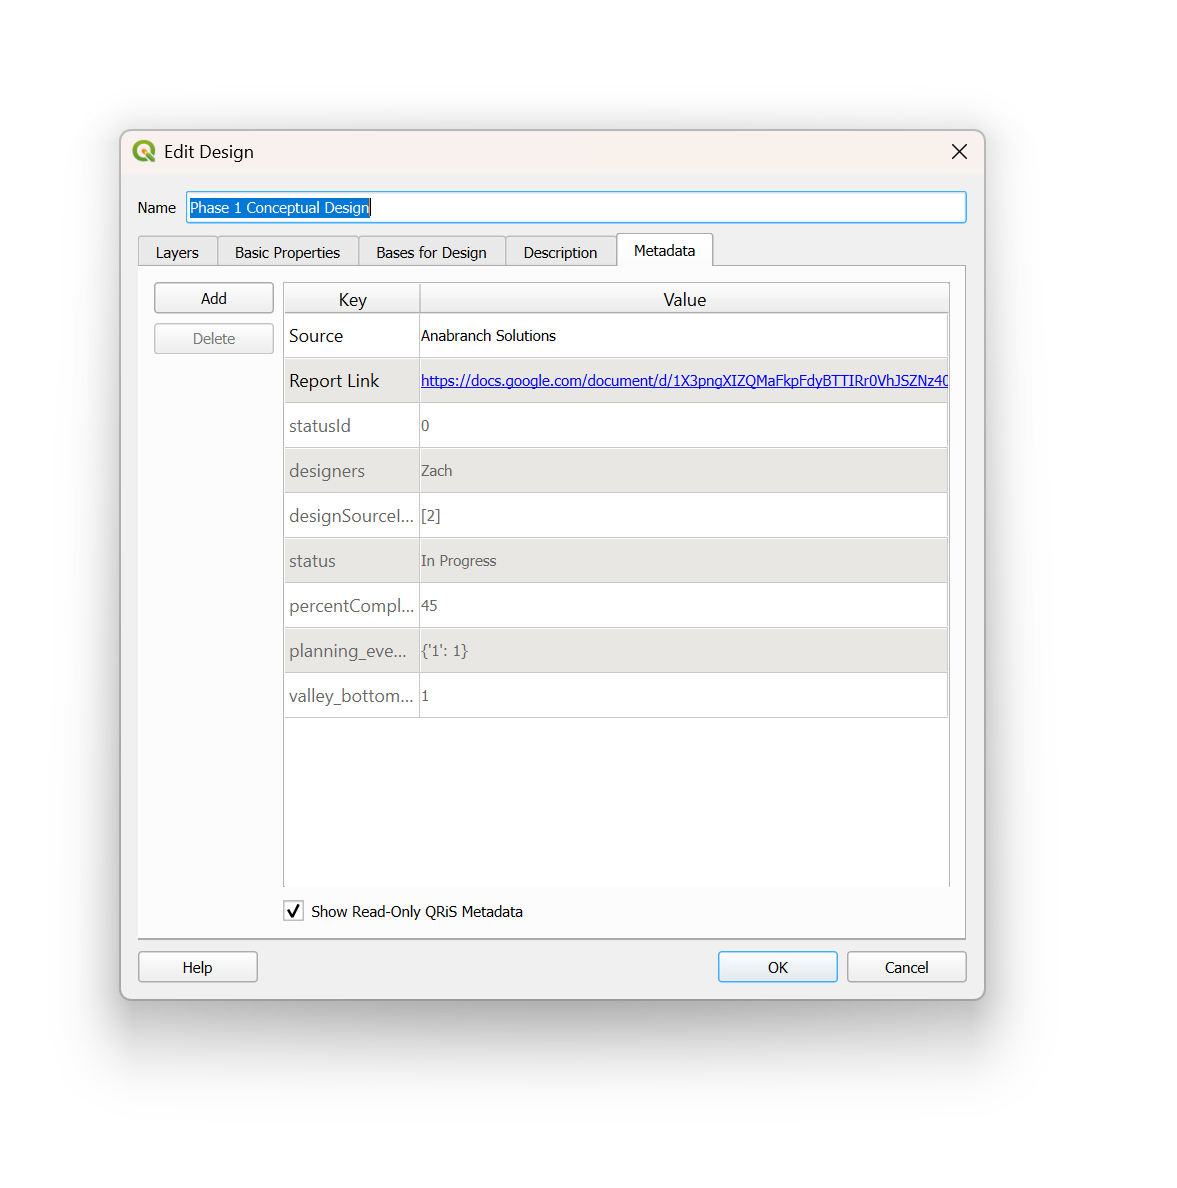
Associated metadata with your design. This can include (but not limited to) website links, file & folder locations, data sources, etc. Also comes with read-only QRiS metadata populated with information from the interface.
Help
If users need help or assistance with LTPBR designs or the interface, click on the Help button in the lower left hand corner of the interface window.
Opening Layers in Map Panel
Once you have finalized the design components within the interface, you can add your layers to the map by clicking on the OK button.