Sample Frames
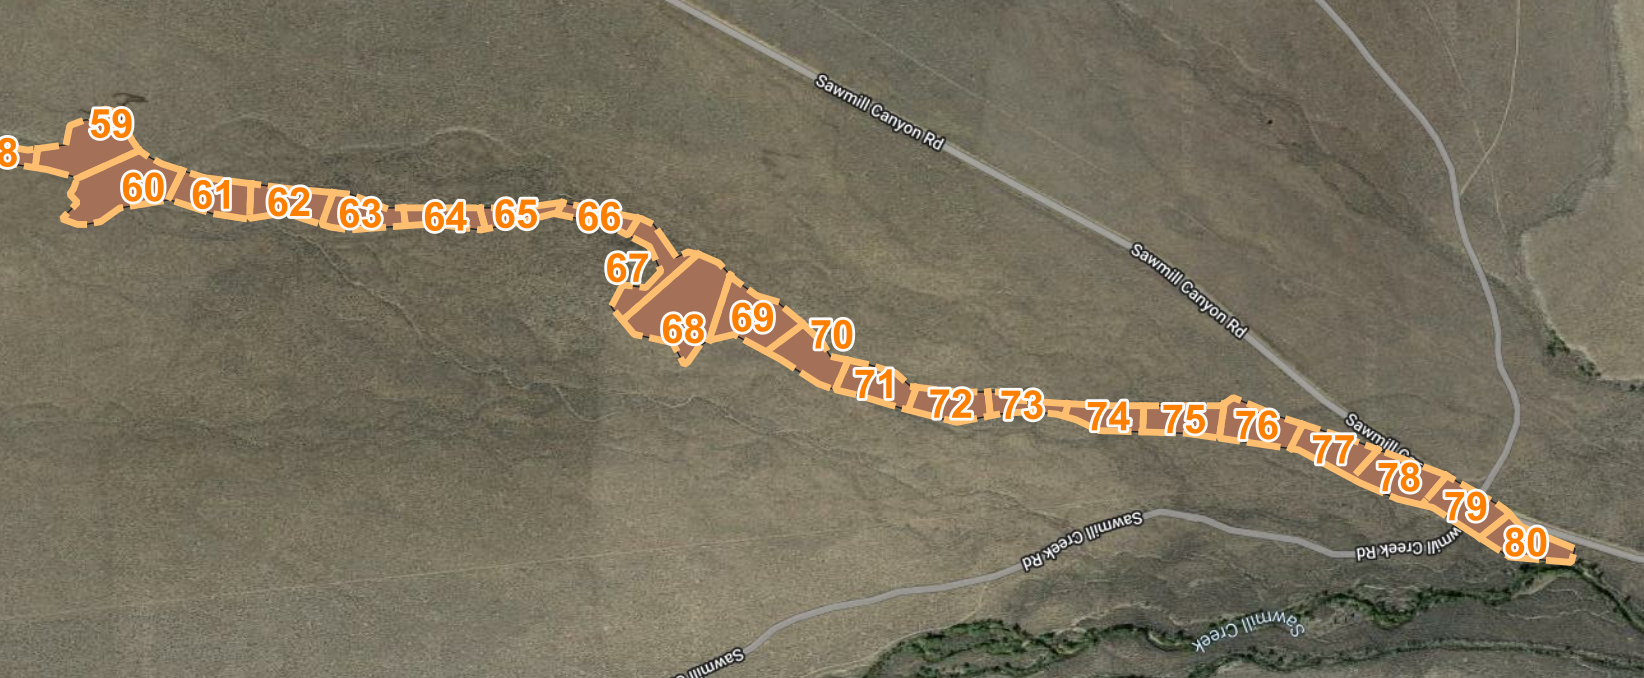
Sample frames are polygon feature classes that divide up your riverscapes into smaller units. Typically these individual polygons span valley wall to valley wall and longitudinally represent coherent geomorphic units, or uniform sections of river.
Sample frames are used to define the spatial extent of your analysis, and to define the spatial units for which you will calculate metrics.
Sample frames are stored within QRiS as a polygon feature class. One string attribute column can be specified as the column to be used for labels when the sample frame is added to the map. This is useful for displaying the name of each polygon on the map. These labels can be brief names or text representations of the polygon ID etc.
In addition to the display label column, there are several fields related to topology included in the sample frame feature class. "flow_path" is used to specify and differentiate between polygons that are connected to each other. "flow_path" is a string field that can be used to specify a unique identifier for each connected set of polygons, similar to NHD level path or stream name. For most cases of a simple stream, one flow_path is used and a default value can be specified. The "flows_into" field is used to specify the flow direction of the sample frame. This field simply references the fid of the downstream polgyon.
Adding a New Sample Frame
Create a New Sample Frame from Scratch
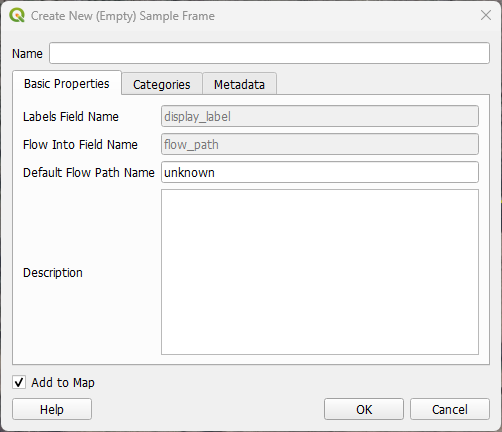
You can create a new sample frame by drawing a polygon on the map. To do this, right click on the Sample Frames folder within the QRiS project and select the Create New Sample Frame menu option, then Empty Sample Frame (Manual). Provide a name and optional Default Flow Path Name and/or description. You may also specify Categorical Fields and attributes on the Categories Tab and Metadata on the Metadata Tab. When you have prepared the Sample Frame properties click OK. Add the Sample Frame to the map by clicking the Add to Map button. You can now use the standard QGIS editing tools to digitize the sample frame on the map. Remember to stop editing and save your changes before the sample frame is available for use when importing other data.
Create a New Sample Frame from Existing QRiS Layers
If you have a QRiS project with existing layers (aoi or scratch polygon, centerline and cross sections) you can create a new sample frame from these layers. To do this, right click on the Sample Frames folder within the QRiS project and select the Create New Sample Frame menu option, then From Existing QRiS Features. Provide a name and optional Default Flow Path Name and/or description. You may also specify Categorical Fields and attributes on the Categories Tab and Metadata on the Metadata Tab. When you have prepared the Sample Frame properties click OK. Add the Sample Frame to the map by clicking the Add to Map button. QRiS will generate the sample frame polygons and add it to your project.
Import Existing Features as a New Sample Frame
You can import an existing polygon feature class and use it as a sample frame. Importing existing data is covered in Importing Features.
Sample Frame Polygon Considerations
Because sample frames are used to define the spatial extent of your analysis, and to define the spatial units for which you will calculate metrics, it is important to consider the following when creating your sample frame:
- Polygons should span valley wall to valley wall.
- Polygons should be mutually exclusive (i.e. no overlap).
- Polygons should, in most cases, be single part features.
- Separate polygons should be used to represent different geomorphic units, uniform sections of river or planning areas.
Achieving mutual exclusivity can be streamlined with advanced digitizing techniques. Help on the topic can be found here.
Follow the snapping settings outlined in the video to achieve mutual exclusivity.
Working with Individual Sample Frames
View/Edit a Sample Frame in the Map
You can add a sample frame to the map by right clicking on any individual sample frame in the QRiS project tree and selecting Add to Map. This will add the sample frame to the map as a new layer.
Once the Sample Frame has been added to the map, you can use the standard QGIS editing tools to edit the polygons. Remember to stop editing and save your changes before the sample frame is available for use when importing other data. Layers that have already been imported using the sample frame will not be updated when you edit the sample frame. You will need to re-import the layers to see the changes.
View/Edit an Existing Sample Frame's Properties
You can edit a sample frame by right clicking on any individual sample frame in the QRiS project tree and selecting Properties. This will open the sample frame in QGIS and allow you to edit the name, description and metadata.
In addition, you can view simple statistics about the sample frame, such as the number of features and total area in the Statistics Tab. You can set the display units and export the statistics as a CSV file for use in other applications.
Delete a Sample Frame
You can delete a sample frame by right clicking on it in the QRiS project tree and selecting Delete. This will remove the sample frame from the QRiS project. You will not be able to delete a sample frame if it is being used by any analyses. You will need to delete any analyses that use the sample frame before you can delete it.
You cannot delete a sample frame if it is locked. You will need to unlock the sample frame before you can delete it.
Tutorials
Part 1: Summarizing Data in QRiS Using Sample Frames
This first installment shows how to use sample frames in QRiS to perform a spatial analysis and generate statistics. This tutorial will show you how to summarize QRiS data within data capture events (DCE), designs, or as-builts. To illustrate how QRiS metrics are calculated, we will look at a monitoring survey in the Upper Bear and summarize statistical data for each individual survey site.
Part 2: Summarizing Data Within Another Layer
QRiS no longer supports this functionality. This will potentially be revisited in future releases of QRiS.
This second installment shows how to use sample frames to summarize QRiS data within another layer. This tutorial highlights a more complex spatial analysis by utilizing sample frames to calculate statistics for HUC 12 watersheds rather than individual survey sites.
Part 3: Summarizing Data Within Multiple Layers
QRiS no longer supports this functionality. This will potentially be revisited in future releases of QRiS.
This final video shows how to use sample frames to summarize QRiS data within multiple layers. Building on the concepts in Part 2, sample frames will be used to summarize survey data by the HUC 12 watershed and the reach type that intersects the survey site.